# Replication Controllers
### What are ReplicationControllers?
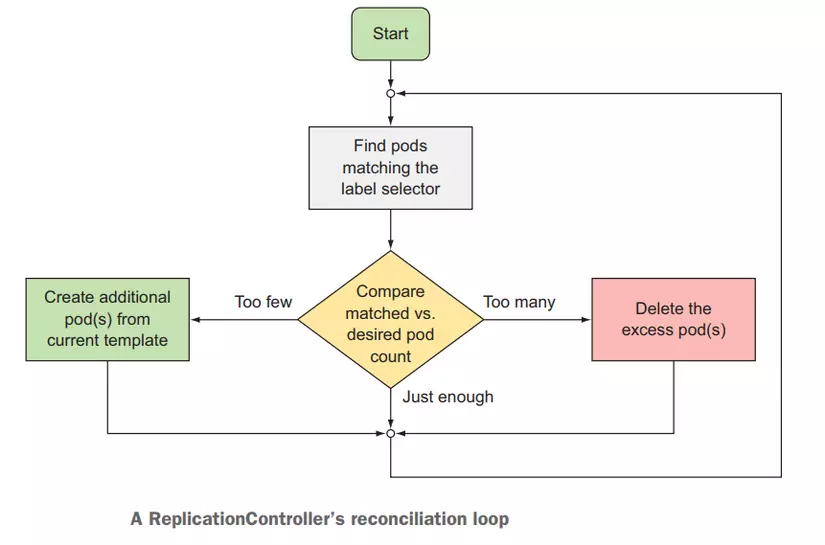
ReplicationControllers is a resource that will create and manage pods, and make sure the number of pods it manages remains unchanged and kept running. ReplicationControllers will create the number of pods equal to the number we specify in the replicas attribute and manage pods through pod labels.
#### Why should we use ReplicationControllers to run pods?
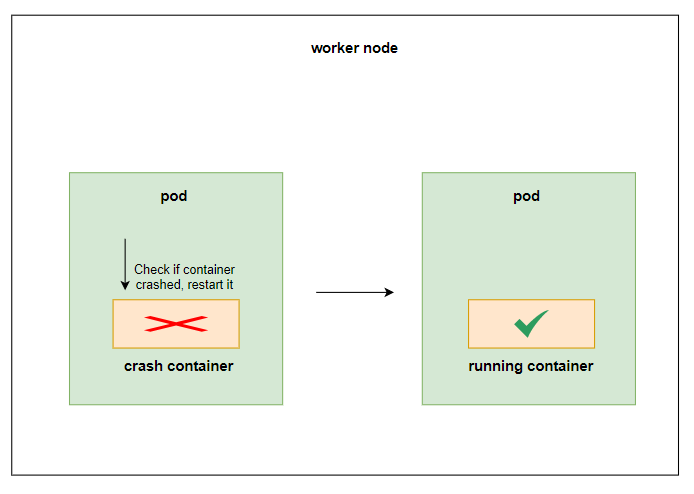
We already know that pod will monitor the container and automatically restart the container when it fails
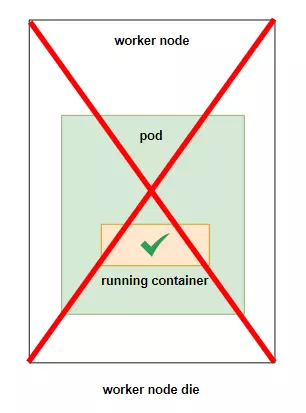
So what happens in case our entire worker node fails? pod it will no longer be able to run, and our application will downtime for users
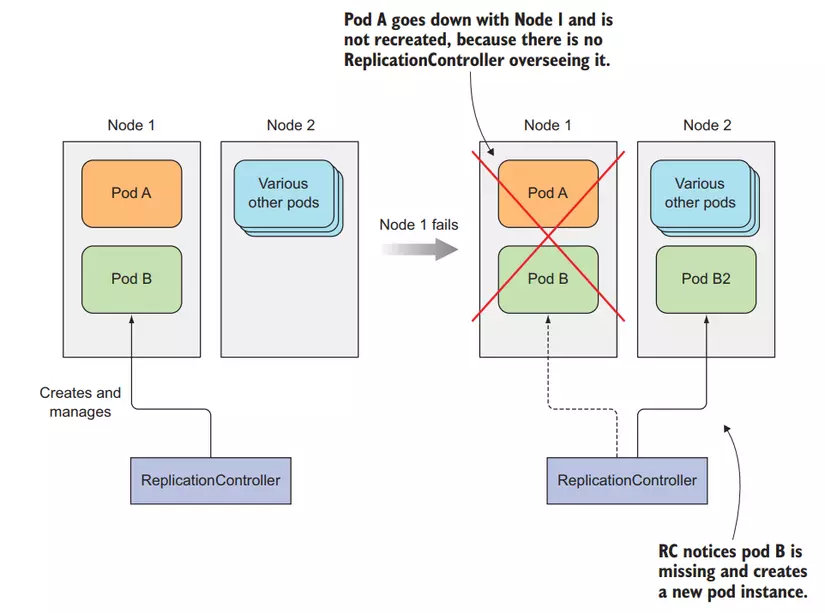
If we run cluster with more than 1 worker node, RC will help us solve this problem. Because RC will make sure that the number of pods it creates does not change, for example when we create an RC with the number of replicas = 1, RC will create 1 pod and monitor it, when a worker node dies, If the RC manager's pod is in that worker node, then the RC will discover that the number of its pods is 0, and it will create a pod in another worker node to regain the number. first
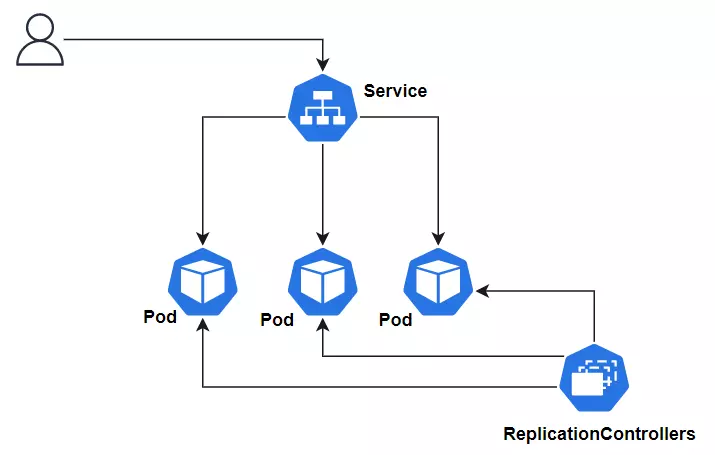
Below is an illustration of how RC works
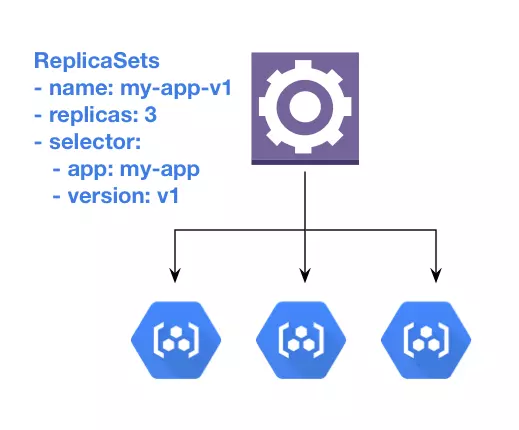
Using ReplicationControllers to run pods will help keep our application as available as possible. In addition, we can increase the performance of the application by specifying the number of replicas in RC so that RC creates multiple pods running the same version of the application.
For example, if we have a webservice, if we only deploy one pod to run the application, we will only have 1 container to handle user requests, but if we use RC and specify replicas = 3, we will have 3 pods running 3. application container, and the user's request will be sent to 1 of these 3 pods, helping our processing process increase 3 times.
### Create a ReplicationControllers
So now that the theory part is over, let's move on to the practical part. Create a file named hello-rc.yaml and copy the following config into it:
```yaml
apiVersion: v1
kind: ReplicationController
metadata:
name: hello-rc
spec:
replicas: 2 # number of the pod
selector: # The pod selector determining what pods the RC is operating on
app: hello-kube # label value
template: # pod template
metadata:
labels:
app: hello-kube # label value
spec:
containers:
- image: 080196/hello-kube # image used to run container
name: hello-kube # name of the container
ports:
- containerPort: 3000 # pod of the container
```
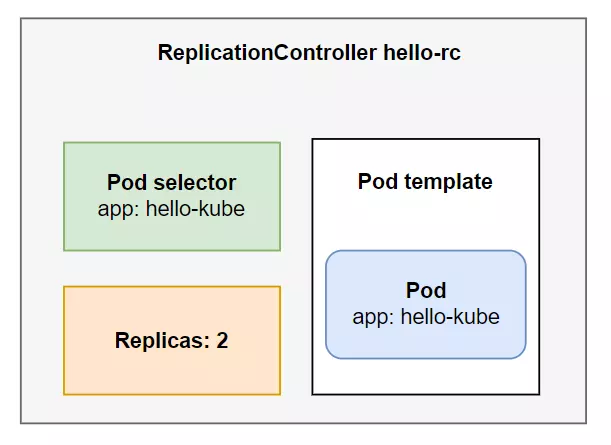
The structure of an RC config file will include 3 main parts as follows:
* label selector: will specify which pods will be monitored by RC
* replica count: number of pods to be created
* pod template: config of the pod to be created
Now let's create RC
`kubectl apply -f hello-rc.yaml`
Check if our rc has run successfully or not
`kubectl get rc`
If the number in the READY column is equal to the DESIRED number, then we have run RC successfully. Now we check whether the number of pods created by RC matches the number specified in the replicas as in theory.
`kubectl get pod`
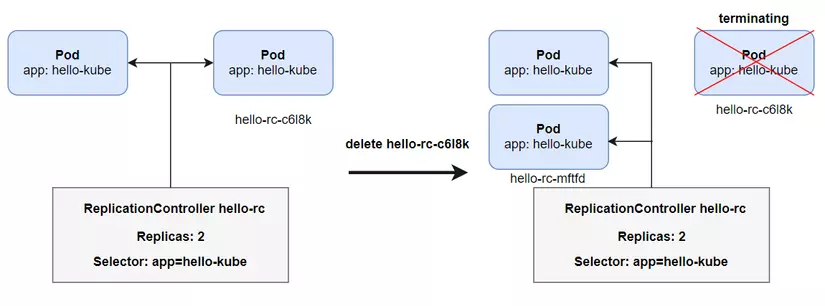
Here, the name of your pod displayed will be different from the picture. If you see there are 2 pods, the number of pods created by RC is correct, the name of the pod created by RC will be in the style **`-`**. Now we will try to delete one pod to see if RC will recreate another pod for us as in theory. Remember to specify the correct name of your pod
`kubectl delete pod hello-rc-c6l8k`
Open another terminal window and type the command
`kubectl get pod`
You will see that an old pod is being deleted, and at the same time, a new pod will be created by RC, here my new pod is called **hello-rc-mftfd** . RC's activities are illustrated as follows
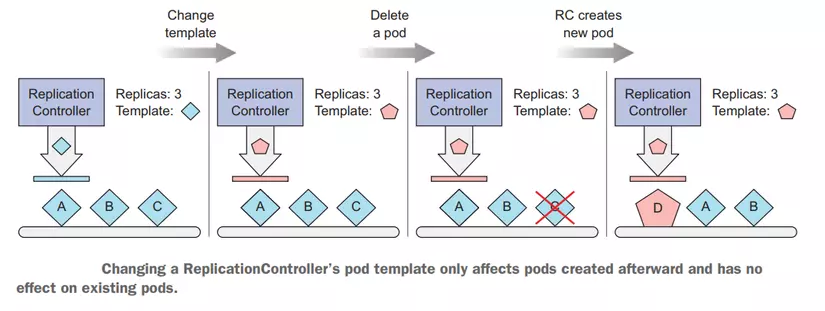
#### Change pod template
You can change the pod template and update the RC, but it will not apply to existing pods. If you want your pod to update the new template, you must delete all pods for RC to create a new pod, or delete RC. and recreate
So we have run RC, now let's delete it. To delete RC, you use the command
`kubectl delete rc hello-rc`
When you delete RC, the pods it manages will also be deleted
As you can see, ReplicationController is a very useful resource for us to deploy pods
### Use ReplicaSets instead of RC
This is a similar resource to RC, but it is a newer version of RC and will be used to replace RC. We will use ReplicaSets (RS) to deploy pods instead of using RC. In this article, I will talk about RC first so that we can understand its origin, so that even if we are asked questions in the interview, we will still know the answer .
Now we will try to create an RS guy, its configuration is still the same as RC, just a few different parts. Create a file named hello-rs.yaml, copy the following config into it:
```yaml
apiVersion: apps/v1 # change version API
kind: ReplicaSet # change resource name
metadata:
name: hello-rs
spec:
replicas: 2
selector:
matchLabels: # change here
app: hello-kube
template:
metadata:
labels:
app: hello-kube
spec:
containers:
- image: 080196/hello-kube
name: hello-kube
ports:
- containerPort: 3000
```
`kubectl apply -f hello-rs.yaml`
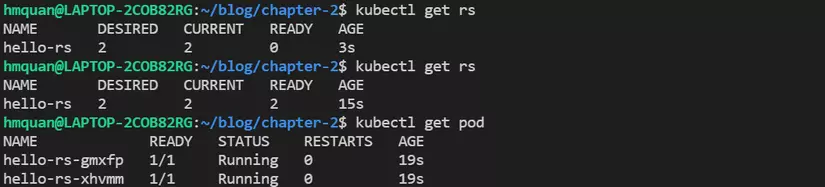
Check if our RS runs successfully or not
`kubectl get rs`
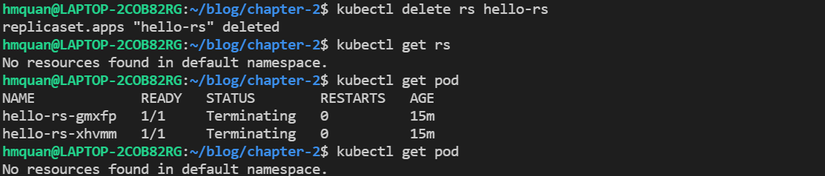
If there are 2 pods created, we have run RS successfully. To delete RS, we use the command
`kubectl delete rs hello-rs`
#### Compare ReplicaSets and ReplicationController
RS and RC will operate similarly. But RS is more flexible in the label selector part, while the RC label selector can only select pods that are completely similar to the label it specifies, the RS will allow the use of some expressions or matching to select the pod it manages.
For example, RC cannot match a pod that has env=production and env=testing at the same time, while RS can, by specifying a label selector like **env=** \* . Additionally, we can use **operators with the matchExpressions** attribute as follows:
```yaml
selector:
matchExpressions:
- key: app
operator: In
values:
- kubia
```
There are 4 basic operators: In, NotIn, Exists, DoesNotExist
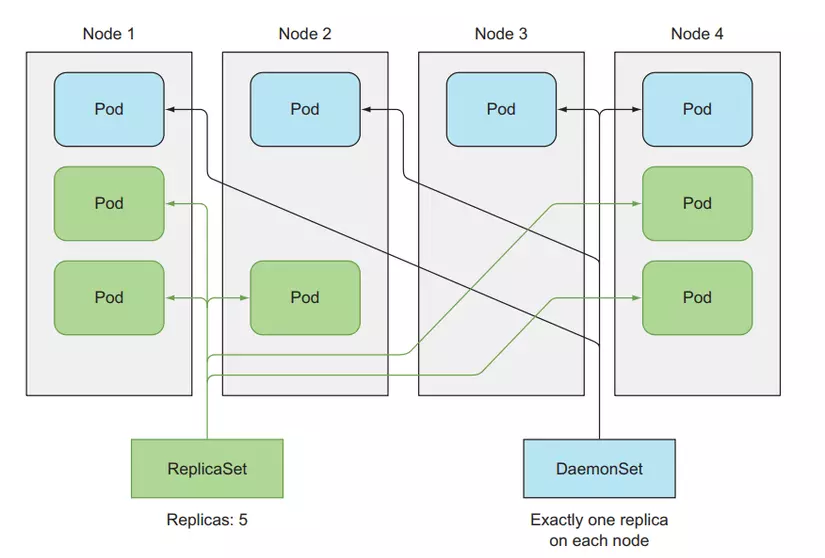
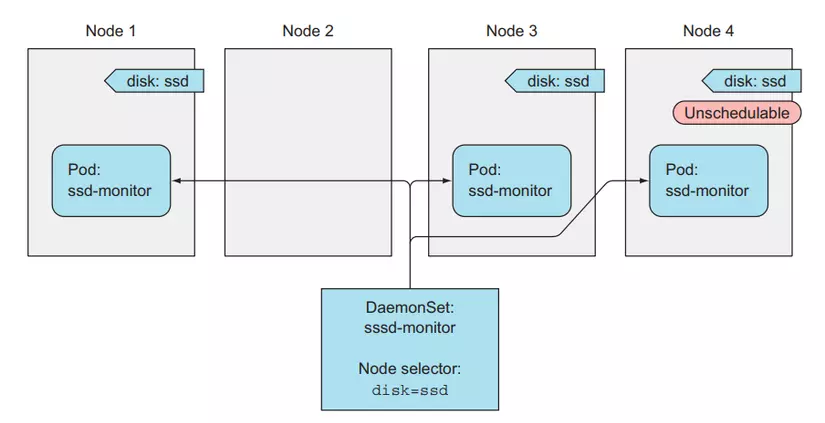
### Use DaemonSets to run exactly one pod on one worker node
This is another kube resource, like RS, it will also monitor and manage pods by lables. But for RS, pods can be deployed on any node, and in one node, several pods can be run. And this DaemonSets guy will deploy to each node a unique pod, and it will definitely have how many pods there are, it will not have the replicas attribute.
This DaemonSets application will be used for logging and monitoring. At this point, we will only want one monitoring pod at each node. And we can also type a label into a woker node using the command
`kubectl label nodes disk=ssd`
Then we can specify the DaemonSets config in the nodeSelector column with disk=ssd. Only deploy the pod on the node with an SSD drive. Here is an example config
```yaml
apiVersion: apps/v1
kind: DaemonSet
metadata:
name: ssd-monitor
spec:
selector:
matchLabels:
app: ssd-monitor
template:
metadata:
labels:
app: ssd-monitor
spec:
nodeSelector:
disk: ssd
containers:
- name: main
image: luksa/ssd-monitor
```
Here we will not practice creating DaemonSets because we need an environment with many worker nodes to demo this resource. You can read more about DaemonSets [here](https://kubernetes.io/docs/concepts/workloads/controllers/daemonset/)
---
# Agent Instructions: Querying This Documentation
If you need additional information that is not directly available in this page, you can query the documentation dynamically by asking a question.
Perform an HTTP GET request on the current page URL with the `ask` query parameter:
```
GET https://huy312100.gitbook.io/software-development/devops/kubernetes/replication-controllers.md?ask=
```
The question should be specific, self-contained, and written in natural language.
The response will contain a direct answer to the question and relevant excerpts and sources from the documentation.
Use this mechanism when the answer is not explicitly present in the current page, you need clarification or additional context, or you want to retrieve related documentation sections.